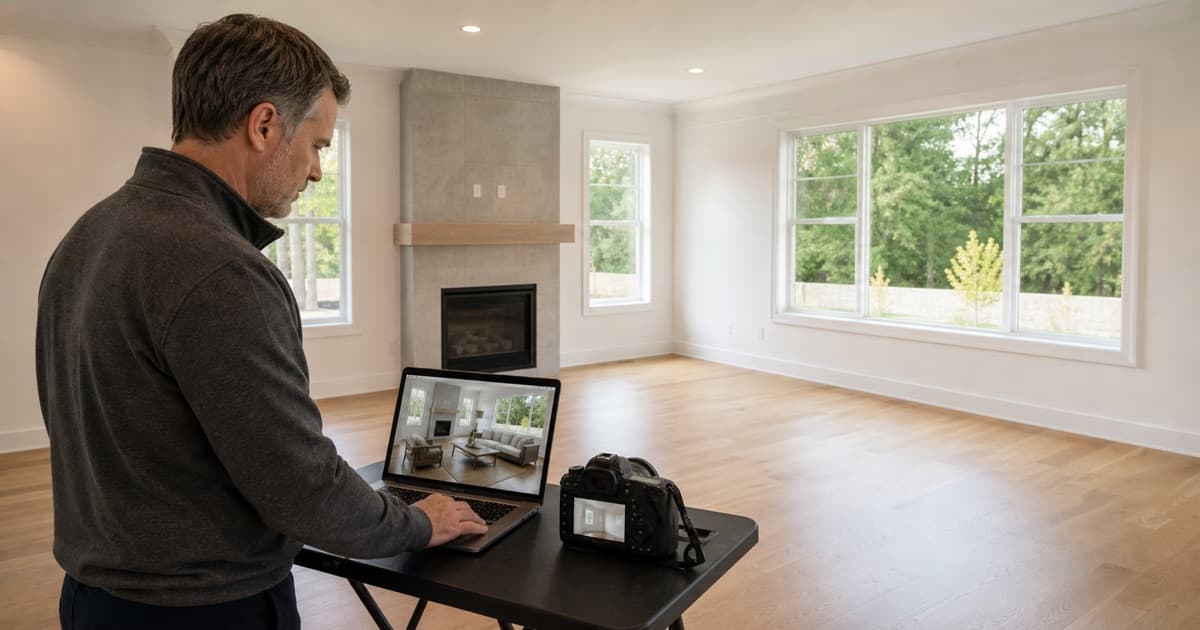
A vacant room can be accurate and still be hard to understand online. Buyers may struggle to judge furniture scale, traffic flow, or what an awkward extra room could reasonably become. AI virtual staging can help with that visualization job.
The useful part is not pressing a button and getting furniture. The useful part is running a controlled workflow that starts with an honest source photo, preserves the property, produces a believable concept, keeps the original, and makes the edit clear to buyers.
This guide explains how to virtually stage a house with AI from room selection through publishing. It is written for agents who want practical listing visuals, not a shortcut around professional photography, broker review, MLS rules, or accurate advertising.
My rule is simple: if the edit changes the property instead of helping a buyer visualize furniture, stop.
What AI Virtual Staging Actually Does
AI virtual staging starts with a real photograph and adds digital furnishings or decor to help viewers understand a possible use of the existing space. The room, permanent features, condition, dimensions, and view should remain faithful to the source image.
That makes virtual staging different from several adjacent visual jobs:
- Photo enhancement adjusts the presentation of an accurate photo, such as brightness, white balance, or sharpness.
- Object removal digitally removes items that were physically present when the photo was taken.
- Renovation visualization shows a possible future condition, such as different cabinets or flooring.
- Virtual staging adds non-permanent furniture and decor to the existing room.
Those categories carry different buyer expectations and review needs. Use the AI virtual staging versus photo enhancement guide when the visual job itself is not yet clear.
When a Listing Is a Good Candidate for Virtual Staging
Virtual staging is usually most useful when the room is vacant, accurately photographed, and difficult to interpret without furniture. It can be a reasonable test for:
- an empty living room where scale is hard to judge
- a vacant bedroom that needs a realistic bed layout
- a bonus room with more than one plausible use
- a dining area whose boundaries are unclear in an open floor plan
- a listing where physical staging is impractical but online context would help
It is a weaker choice when the problem is poor photography, clutter, visible condition, an inaccurate camera angle, or a room that already communicates well. AI furniture will not repair a weak source image.
A quick room-selection test
Before staging a room, answer five questions:
- What is genuinely hard for a buyer to understand in the original?
- Would furniture clarify scale, function, or traffic flow?
- Can the room be staged without hiding material condition?
- Will the proposed use remain plausible given the room's actual dimensions and features?
- Can you keep and present the original image with clear context?
If you cannot name the buyer-understanding problem, do not stage the room just because the tool is available.
What AI Virtual Staging Should Never Change
The architecture and physical truth of the property are the fixed layer. Do not publish an output that adds, removes, stretches, repairs, or obscures:
- windows, doors, walls, fireplaces, stairs, or built-ins
- flooring, counters, fixtures, finishes, or permanent lighting
- ceiling height, room depth, sight lines, or window views
- water stains, damaged materials, unfinished work, or deferred maintenance
- utility equipment, structural elements, or access points
- features that affect whether a room can legally or practically serve the depicted use
I would rather show an obviously empty room than a polished image that creates the wrong expectation. A buyer should not arrive and have to mentally reverse the marketing.
Prepare the Listing Before You Open a Staging Tool
Confirm the marketing plan with the seller
Explain which rooms you may stage, where the images may appear, how originals will be retained, and how edited images will be identified. Record the approval in the same place your team keeps the rest of the listing-marketing decisions.
Check the applicable rules
MLS, brokerage, advertising, platform, and local requirements vary. Some require specific labels, captions, paired originals, or limitations on digital alterations. Check the rules that apply to the actual listing before producing the final image, and involve your broker when the boundary is unclear.
Decide who owns the final review
The person creating the output and the person approving it do not have to be the same. Name the final reviewer. On a team, also name who verifies captions, file order, and MLS upload.
Source Photo Standards for Better Virtual Staging
A staging model needs a clear source image, just as a designer needs a trustworthy floor plan. Start with professional listing photography when the listing and budget justify it. At minimum, use an image that is:
- sharp and properly exposed
- level vertically and horizontally
- wide enough to communicate the room without extreme lens distortion
- free of people, pets, moving objects, and private information
- consistent with the property's current condition
- high enough resolution for the intended marketing channel
The listing photo shot-list and visual-review workflow covers capture planning in more detail.
Do not crop away the very features you need to verify later. The original photo is not clutter. It is the source record.
A Practical AI Virtual Staging Workflow
Step 1: Create a source folder and preserve originals
Copy the approved original photos into a read-only or clearly labeled source folder. Do not overwrite them during export. A simple structure works:
listing-photos/
  01-originals/
  02-staging-drafts/
  03-approved-staged/
  04-mls-exports/
  staging-review-log.txt
Keep image numbers consistent across folders so the source and staged versions stay paired.
Step 2: Choose only the rooms that need help
Stage the smallest useful set. A vacant primary living area and one bedroom may provide enough context. Filling the gallery with multiple artificial versions can weaken trust and make the real condition harder to understand.
Use the original listing-marketing plan to decide what belongs in the photo sequence. The real estate listing marketing checklist helps connect photos to the rest of the launch.
Step 3: Write a short room brief
Define the room, intended function, realistic furniture scale, desired level of styling, and fixed features that must not change. Keep style choices tied to the property and marketing presentation, not assumptions about a protected class or the identity of a likely buyer.
A useful brief might say:
Vacant 14-by-16-foot living room in a mid-price suburban home.
Add a realistically scaled sofa, two light chairs, a low coffee table,
one rug, and restrained decor. Preserve every wall, window, outlet,
fireplace detail, floorboard, view, and lighting condition. Keep walking
paths open. Do not add built-ins, fixtures, architectural features, or text.
Step 4: Generate more than one restrained option
Create a few controlled variations rather than accepting the first output. Change one variable at a time, such as furniture arrangement or style. If every generation uses a different room layout, you cannot tell whether the tool is preserving the source.
Avoid overfurnishing. Empty floor area is useful evidence of scale and circulation.
Step 5: Compare every output against the original
Place the source and staged images side by side at the same size. Review from the outside of the frame inward:
- window count, size, trim, mullions, and view
- doors, openings, wall edges, and ceiling lines
- fireplace, cabinets, built-ins, fixtures, outlets, and vents
- floor pattern, transitions, damage, and visible condition
- room proportions, camera position, and perspective
- furniture scale, shadows, contact points, and traffic paths
Zoom in. AI errors often hide at the edge of a rug, behind a chair, inside a window, or where a furniture leg meets the floor.
Step 6: Reject outputs that require an explanation
If a window moved, a fireplace widened, a wall straightened, a stain disappeared, or the furniture only fits because the room was stretched, reject the image. Do not keep editing around a fundamentally unreliable output.
I would delete any staged version that makes me explain away the actual room.
Step 7: Check the staged use against the room
Furniture should support a plausible use, not imply a fact the agent has not verified. Be especially careful with bedrooms, basement spaces, access, egress, ceiling height, and other classifications that may carry legal, MLS, or local meaning.
The image can illustrate a possible furniture arrangement. It should not reclassify the property.
Step 8: Approve, label, and export deliberately
Use a filename that clearly preserves the relationship:
12-living-room-original.jpg12-living-room-virtually-staged.jpg
Export to the size and format required by the destination rather than repeatedly recompressing the same file. Keep an approved master and a separate upload copy.
Step 9: Add the required disclosure and image context
Use the exact approach required by your MLS, brokerage, advertising channel, and local rules. That may include a photo caption, visible label, listing remark, paired original, or another approved method.
Disclosure should be plain. For example, where allowed and appropriate:
Virtually staged image. Furniture and decor are digital and shown
for visualization. See the original vacant-room photo for current condition.
This is sample wording, not a universal compliance template. The AI virtual staging disclosure guide provides a fuller review checklist.
Step 10: Review the published gallery
Open the live listing as a buyer would. Confirm that the staged image is the approved file, disclosure remains visible, the original is available when required or planned, image order makes sense, and no platform crop removes essential context.
Save a final record of what was published, where, when, and who approved it. If the listing changes or an image is replaced, update that record.
Virtual Staging Quality-Control Scorecard
Use a pass, revise, or reject decision for each category. One serious accuracy failure should outweigh several cosmetic strengths.
| Review area | Pass standard | Reject signal |
|---|---|---|
| Architecture | Walls, windows, doors, fireplace, and built-ins match the source | A permanent feature moves, changes, appears, or disappears |
| Condition | Visible materials and condition remain honest | Damage, wear, unfinished work, or a limitation is hidden |
| Scale | Furniture fits with believable circulation | The room appears stretched or furniture scale creates a false impression |
| Realism | Lighting, shadows, contact points, and perspective are coherent | Floating furniture, warped edges, duplicate objects, or impossible shadows |
| Context | The image helps explain a plausible use | The staging implies an unverified room classification or feature |
| Disclosure | The approved disclosure remains clear in the final channel | The edit could be mistaken for the current physical condition |
Example Prompt: Create a Controlled Room-Staging Brief
Use this with a staging tool that accepts instructions. Remove private or unnecessary information, and do not rely on the prompt to enforce accuracy by itself.
You are assisting with a virtual-staging concept for an existing
real estate listing photo.

Objective:
Add realistic, non-permanent furniture and decor that help a buyer
understand the room's scale, function, and traffic flow.

Source room:
- Room type:
- Approximate dimensions:
- Property style and price-position context:
- Fixed architectural features:
- Visible condition that must remain unchanged:
- Camera angle and key sight lines:

Staging direction:
- Intended room function:
- Furniture pieces requested:
- Furniture scale:
- Design direction:
- Areas that must remain open:
- Level of decor: restrained

Hard guardrails:
- Preserve the exact room architecture, dimensions, perspective, and view.
- Do not add, remove, repair, resize, repaint, or restyle any permanent feature.
- Do not hide damage, wear, utilities, unfinished work, or condition.
- Do not add text, people, pets, logos, or personal items.
- Do not imply that digital furnishings are included with the property.
- If the requested layout cannot fit plausibly, return a simpler layout.

Output:
Create one realistic staging concept with natural lighting, believable
shadows, correct contact points, and enough open floor area to judge scale.
Example Prompt: Review a Staged Image Against the Source
A vision-capable AI tool may help create a first-pass issue list. The agent or approved reviewer still owns the comparison and publishing decision.
You are helping me compare an original real estate listing photo with
an AI-virtually-staged version of the same room.

Guardrails:
- Do not decide that the image is compliant, accurate, or safe to publish.
- Do not give legal, MLS, or brokerage advice.
- Do not infer room dimensions or property facts that are not visible.
- Flag uncertainty instead of filling gaps.

Review in this order:
1. Walls, windows, doors, openings, ceiling lines, and room shape.
2. Fireplace, built-ins, fixtures, outlets, vents, flooring, and trim.
3. Visible condition, defects, wear, and unfinished work.
4. Camera perspective, room scale, and window view.
5. Furniture scale, circulation, shadows, reflections, and contact points.
6. Possible room-use or buyer-expectation problems.
7. Disclosure and original-image questions for human review.

Requested output:
- A table with issue, location, confidence, and recommended human check.
- A separate list of any apparent permanent-property changes.
- A separate list of possible AI artifacts.
- Missing information that prevents a conclusion.
- A final recommendation of pass to human review, revise, or reject.

Never say the image is approved for publication.How to Use Original and Staged Photos Together
The cleanest presentation often gives buyers access to both. The original establishes current condition. The staged version illustrates a possible furniture layout. Depending on the applicable rules and platform, you might place them next to each other in sequence, use clear captions, or include the original elsewhere in the gallery.
Do not assume buyers will notice a small watermark, remember a disclosure from the remarks, or understand what changed. Review the complete experience on mobile, where captions and image crops may behave differently.
Common AI Virtual Staging Mistakes
Staging every empty room
More outputs do not automatically create a better gallery. Stage only where visualization adds meaningful context.
Using the first generation
The first image can look polished while quietly changing a window, floor pattern, or wall edge. Compare every version.
Trying to fix photography with furniture
Correct exposure, framing, and perspective upstream. Do not ask staging to rescue a poor source.
Choosing style before function
Start with the room's use, scale, and traffic flow. Decor comes later.
Hiding the original
Keep an accessible source record and use the original in the buyer experience when required or appropriate.
Treating disclosure as a footer problem
Disclosure belongs in the actual channel where the edited image appears, using the method your rules require.
Letting AI make a factual decision
AI does not determine whether a room qualifies as a bedroom, whether an edit is permitted, or whether an image is compliant. Those are human, broker, MLS, and sometimes legal questions.
Where Virtual Staging Fits in the Listing Workflow
Virtual staging sits after property preparation and photography but before final gallery approval. It should connect to the rest of the listing package:
- Use the real property details and positioning from the pre-listing preparation checklist.
- Keep photo choices aligned with the listing launch plan.
- Write accurate copy with the AI listing description workflow.
- Use the approved images consistently in the listing presentation workflow.
- Review the broader real estate AI compliance checklist before publishing client-facing AI output.
The staged image is one marketing asset. It should not become a separate version of the property.
Virtual Staging Publishing Checklist
- Seller-approved staging plan documented
- MLS, brokerage, advertising, and local requirements checked
- Original source files preserved
- Only rooms with a clear visualization need selected
- Room briefs use realistic function and scale
- Architecture and permanent features compared side by side
- Condition and visible defects remain accurate
- Furniture, shadows, contact points, and circulation reviewed
- Questionable or materially altered versions rejected
- Original and staged files named distinctly
- Required disclosure added in the correct channel
- Original image included or retained as required
- Final gallery checked on desktop and mobile
- Approver, publication date, and destinations recorded
The Best First Step
Start with one strong vacant-room photo. Write a plain room brief. Generate two restrained versions. Put each beside the original and inspect the architecture, condition, scale, and artifacts before you judge the decor.
That single-room test will tell you more about the tool and your review process than staging an entire property at once.
Final Takeaway
AI can make virtual staging faster, but speed is not the standard. A useful output must help buyers understand the room while preserving the truth of the property.
If a staged still becomes the beginning or ending of a generated clip, apply the AI listing video frame-review workflow to inspect intermediate frames, motion, narration, disclosure, rights, and channel-specific exports.
The agent still owns room selection, source accuracy, seller communication, rule checks, quality review, disclosure, file control, and the final publishing decision.
Keep the original. Change only the furniture layer. Reject anything you would have to explain away in person.